Showing posts with label DIY Proejct. Show all posts

Tutorial Tuesday: Glittery Prom Girl

Melissa from Buckets of Grace is in the house! She's here to share a DIY project from her daughter's Enchanted Prom Birthday Party.

Thank you to Christine for featuring a tutorial on Grace's Glittery Prom Girl. The Prom Girl was the belle of the ball!  Not only was she adorable, but she was inexpensive and easy to make.  This technique can be used for any sort of decoration - a large monogram, a dinosaur, the possibilities are endless!

Here are the materials you will need:
* Transparency
* Photo copier
* Overhead projector
* Exacto knife
* Matte board
* School glue
* 1 or 2 bottles of glitter
* Spray lacquer
* Large frame (optional)
* Fabric (optional)
* Satin ribbon (optional)


  1. Take the invitation and transfer the Prom Girl to a transparency using a photo copy machine.


  2. Use an overhead projector to project the image. Then trace the image onto a piece of matte board (purchased from Hobby Lobby for 50% off).
  3. Use an exacto knife to carefully cut out the image.
  4. Put glue on one workable section at a time, then spread it with your finger. Working quickly, sprinkle the glitter over the glue.  Repeat this until the entire object is covered in glitter.
  5. Allow the glue and glitter to dry, then spray the Prom Girl with lacquer.  Spray on a few coats, allowing it to dry between coats.
  6. Staple fabric to the back side of the frame using a staple gun.
  7. Once the Prom Girl is completely dry, staple her to the frame.  If she fits in the frame, use hot glue or fabric glue to adhere her to the fabric.
  8. Staple a piece of satin ribbon to the center of the frame to create an illusion that she is hanging from the ribbon.  Finally, hang the frame from a nail on the wall.
Here is the final product!


I couldn't part with the Prom Girl after the party.  She now proudly hangs in my craft room as a sparkly new addition!

Thank you Christine for letting me share our fun project on your fabulous site!

Tutorial Tuesday: Apple Pencil Cake Pops

Did you happen to catch Harper's Vintage Schoolhouse 1st Birthday Party featured on Kara's Party Ideas and Pizzazzerie? Audrey of Sweet Cheeks did such an incredible job with the details and styling, and even shares the tutorial for the darling apple pencil cake pops.

Tutorial Tuesday: Paper Flower Wreaths

Heather of Did Someone Say Party shows you how to create these gorgeous paper flower wreaths without getting FPHS (Flower Punch Hand Shake). Go here for the step-by-step tutorial. Starting this Friday, I'll be rounding up DIY projects for your Easter/Spring party, so be sure to check back all month long for more ideas and inspirations.

Paper Flower Wreath Collage copy

Tutorial: Transformers Party Banner

Since Autobots transform into vehicles, I decided to make a banner that resembles chrome wheels and customize it with Camden's name. These decorations are also great for car theme parties.


For this tutorial, you'll need 12"x12" silver metallic card stock (each sheet makes 2 hubcaps), 8.5"x11" black card stock for each letter in the name, 8.5"x11" red card stock, glue, and scrapbook wire.

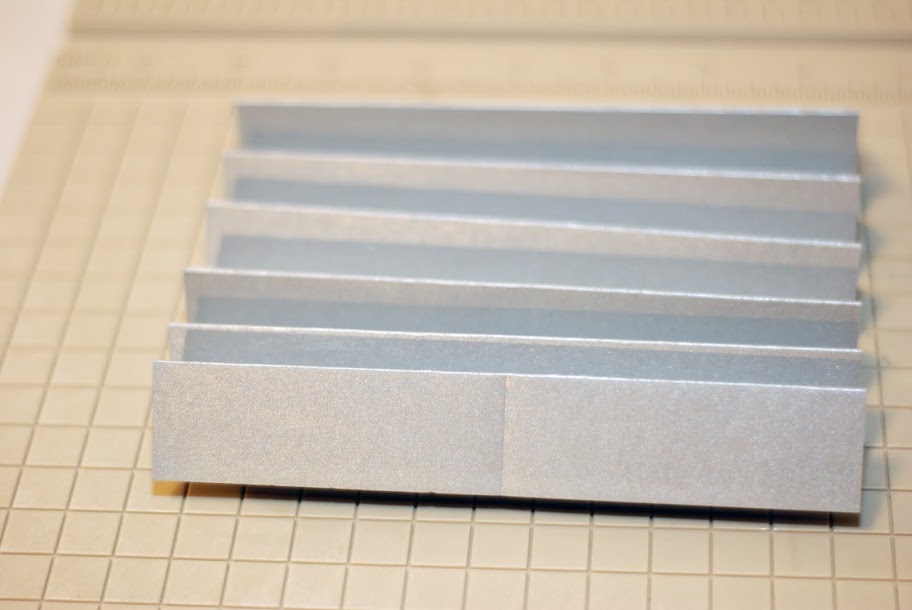
1. Cut the 12"x12" silver card stock in half and score 1" lines along the shorter side.


2. Make a fan, then make a score down the middle.


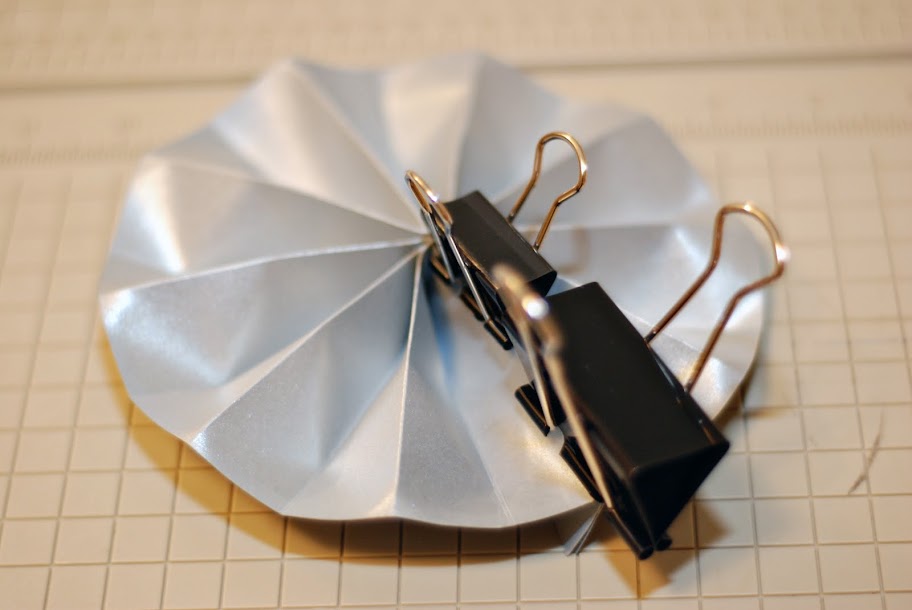
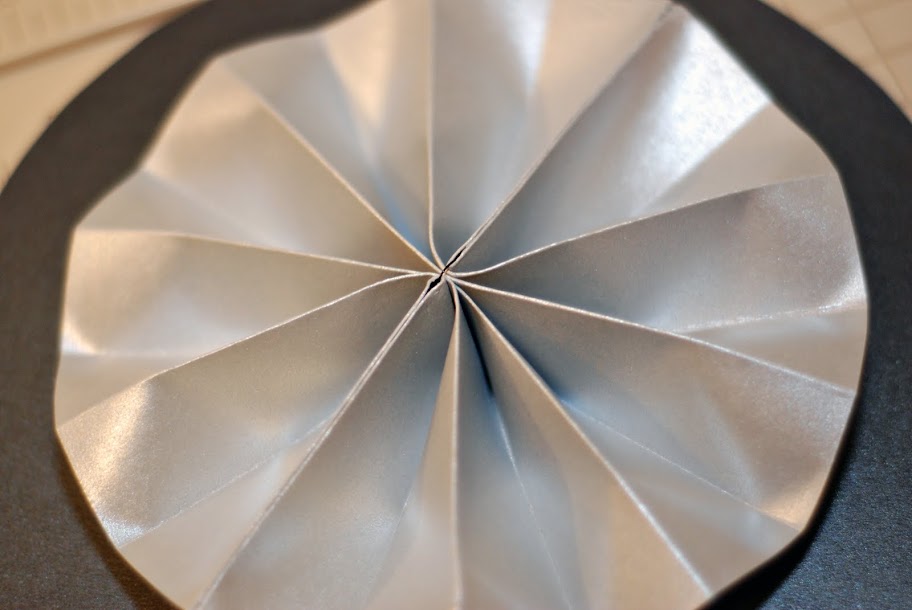
3. Bend the strip in half and glue the ends together. Use paper binding clips to help keep it in place. Repeat on the other side.


4. Trace and cut an 8 1/4" circle out of the black paper. I used a round cookie tin lid for tracing. Then make a small hole in the center of the tire.

5. Thread scrapbook wire through the center of the hubcap and tire.


6. Print the name of the birthday boy on plain copier paper. Cut the letters and trace them onto the red card stock. Cut out the red letters and glue them onto a wheel.

See the completed banner and details of the Transformer party when I post pictures this weekend.

Tutorial: Jurassic Cookie Pop Stand

For the DINOfour party favors, I'm ordering cookie pops from Michelle at Sugar Cookie Creations. So yesterday, I started working on one of the DIY projects for the party -- a Jurassic cookie pop stand.

jurassic cookie pop stand

For this project, you'll need stryofoam, cardboard, green construction paper, black cardstock, red felt, and brown crinkle confetti.

1. Glue a 19 1/2" W x 17" H x 1" D sheet of styrofoam onto a piece of cardboard that's the same size.

2. Cut green construction paper into 2" H strips, then cut zig zags along the top to resemble grass.

3. Glue the paper to the bottom edge of the styrofoam/cardboard.


4. Cut a 15" W x 12 1/2" H x 1" D styrofoam sheet, glue it on top of the other styrofoam sheet, and repeat steps 2 and 3.

5. Curl the grass with a pencil, then scatter brown crinkle confetti over the bottom styrofoam sheet.


6. To make the volcano, form a cone with black cardstock.


7. Cut pieces of red felt to resemble lava and glue to the opening of the volcano.

8. Lastly, glue the base of the volcano to the top stryofoam sheet and cover with confetti.
previous home