
Well it turns out that Loan lives just down the road from Xiaolu, our newest blog contributor from 6 Bittersweets, so we all got together a few weeks ago to shoot this tutorial for Angry Birds fondant toppers.

Here are the supplies you'll need:
* red, white, yellow, black and green fondant
* tylose or water for the "glue"
* rice krispies treats
* fondant roller
* black edible marker
* round piping tips
* round cutters
* small brush
* exacto knife
* dresden tool (optional)

First, roll the rice krispies treats into a ball the size of a gumball. Then knead the red fondant until it becomes soft and pliable. Roll out the fondant and cut out with a 2" round cutter.

Wrap the rice krispies treats ball completely with the fondant, then roll between your hands to remove the seams.

Roll out the white fondant. Cut out with a 1" round cutter and roll into an oval. Brush with a small amount of tylose or water and adhere to the red ball.

Shape the yellow fondant into a small cone, glue on the beak and score with an exacto knife.
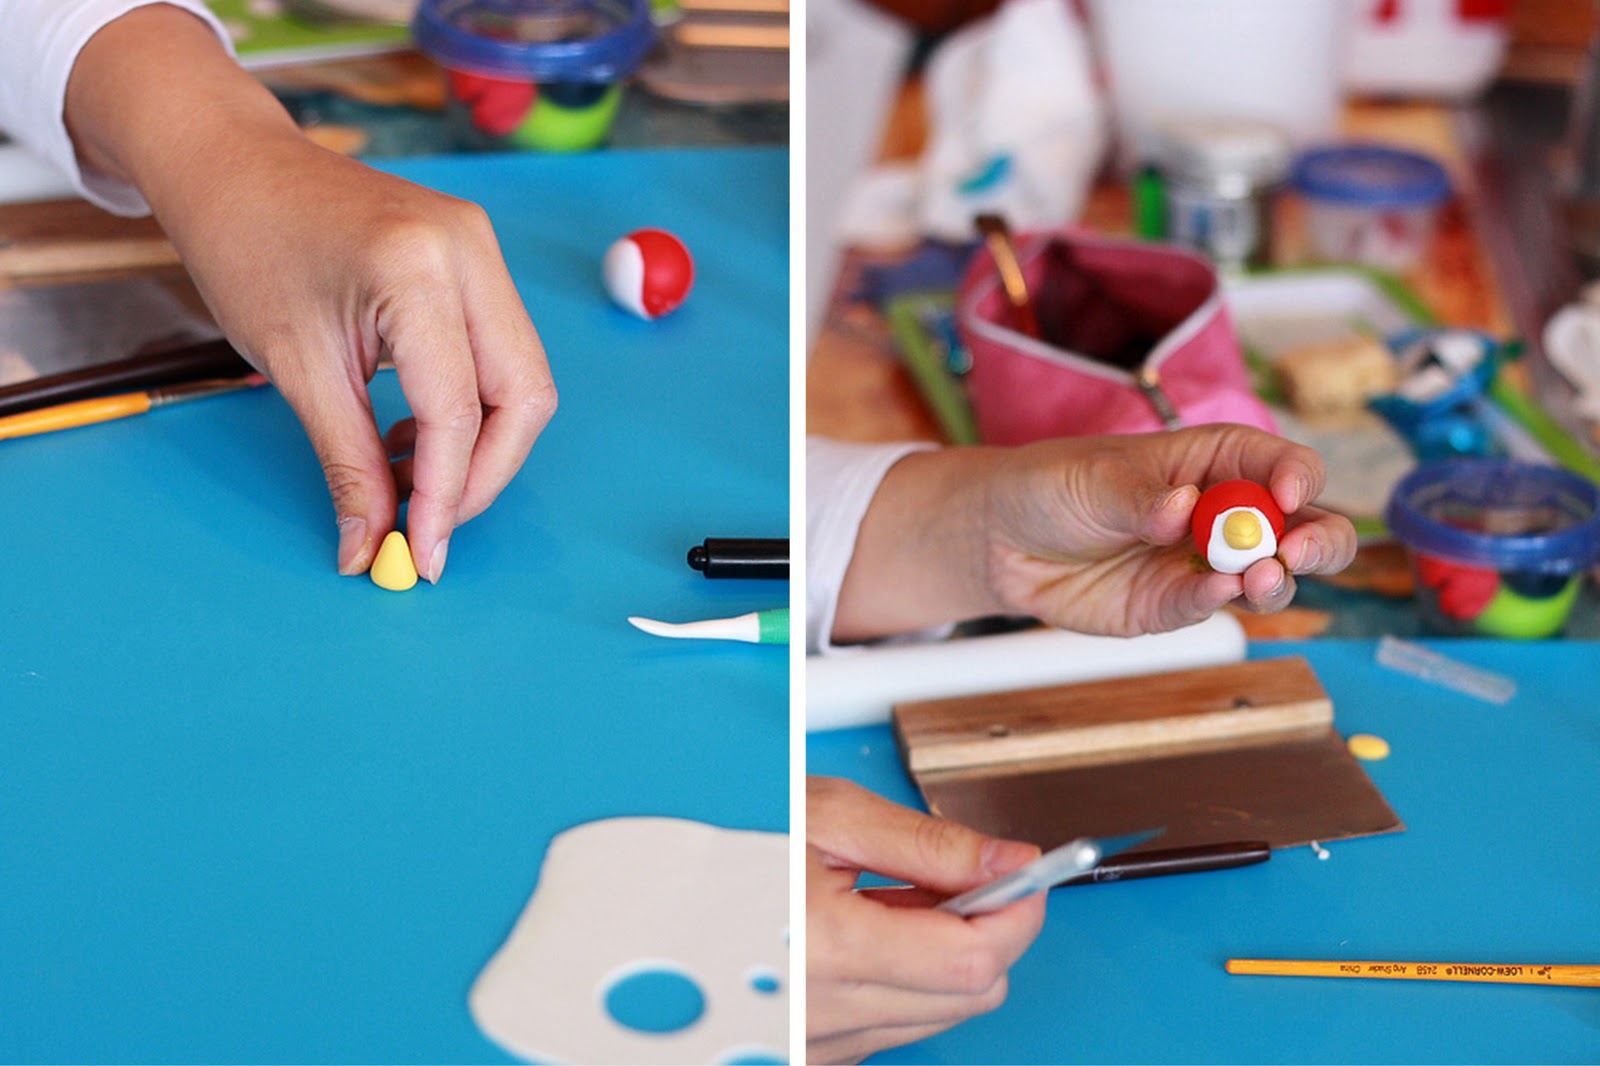
For the eyes, cut out 2 white circles with a small piping tip and glue above the beak. Draw in the pupils with the black edible marker. For the eye brows, make elongated tear drops from the black fondant and glue above the eyes.

Now for the finishing touches. Form a red tear drop, score to create the head feathers, then glue to the top. For the tail feathers, form a black tear drop, score twice, then glue to the back.

On to the green pig! Follow the steps above to make the head. Form an oval for the snout, glue onto the head, then use the dresden tool to create the nostrils. For the eyes, cut out 2 white circles with a small piping tip and glue above the sides of the snout. Draw in the pupils and eye brows with the black edible marker.

Lastly, form 2 tear drops for the ears, press down the center with the dresden tool, and glue to the top of the head.

Thanks, Loan for sharing the tutorial. Visit PhoebeCakes to see more of her incredible fondant creations, including a whole Angry Birds cake.
Photography: 6 Bittersweets


A lovely tutorial! I wish I could find fandont here.
ReplyDeleteCheers,
Rosa
I know it's late but I made these last night with homemade marshmallow fondant and they turned out super! 👍
DeleteThanks for sharing the tutorial! I love your blog :)
ReplyDeleteI have never ever worked with Fondant but these are just too adorable for words....:)
ReplyDeleteOhhh...Those birds look gorgeous! I've never played with fondant before and am looking forward to having a go. And this tutorial is just wonderful :) Thanks for sharing... Great job!
ReplyDeleteHave a wonderful day!
You guys are all just too, too talented! These are ADORABLE. : )
ReplyDeleteThese are so cute! Only if I had that much creativity inside me :) But this tutorial is really helpful, may be I should just give a try.
ReplyDeletethanks for sharing this tutorial. these are sooo cute
ReplyDeleteHuge Angry Birds fans over here!! This is very exciting for me ;) Never used fondant before, but I am going to tackle it with this tutorial and idea!! Thanks for sharing, would love for you to share it with us at our linky party :) Going on now!
ReplyDeleteBritney
www.jandmseyecandy.blogspot.com
beautiful. Linked (and I borrowed a photo on my bandwidth...if you object I'll removed it).
ReplyDeleteJust cute! Loan's into cakes now? No more flowers? -- Dinh
ReplyDeleteThank you for this tutorial, the cake made my daughter very happy!
ReplyDeleteI tagged you in a post ;-)
http://www.witchycrazymommy.com/2011/12/sofies-oh-so-angry-bird-birthday-part-1.html
Thank you so much for sharing your tutorial... You are great!
ReplyDelete